![]()

Installation instructions

![]()
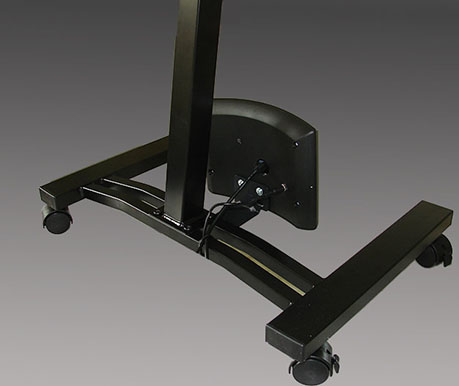
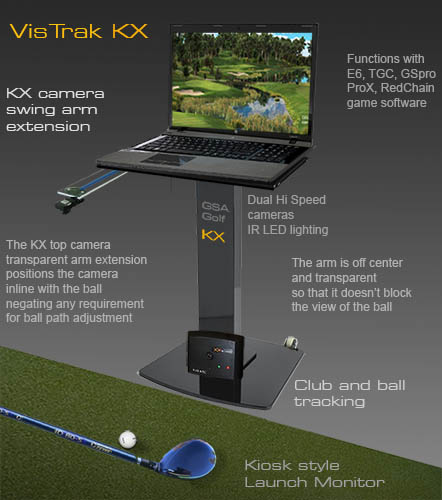
KX AR assembly
Super easy assembly - just unpack the monitor stand and assemble as per the instructions
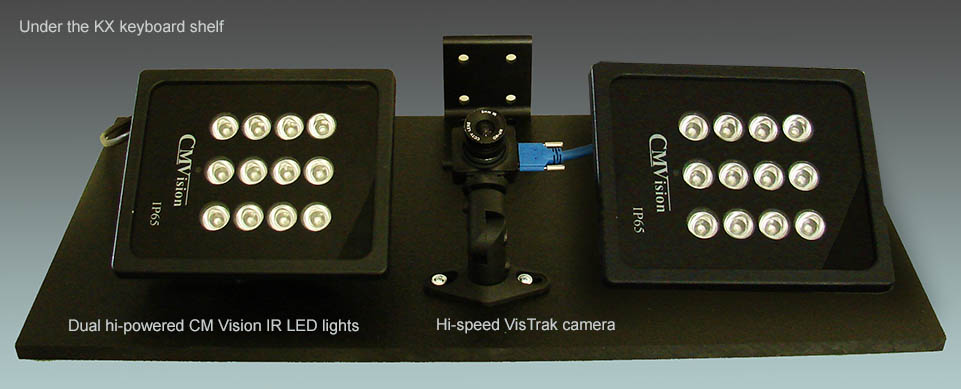
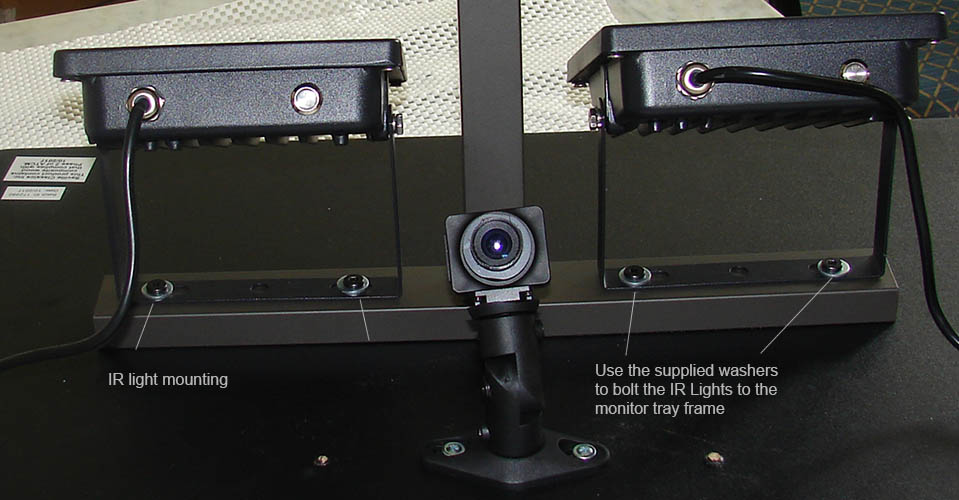
and screw on the 2 IR Led CM Vision lights and the camera to the underside of the monitor stand as shown below
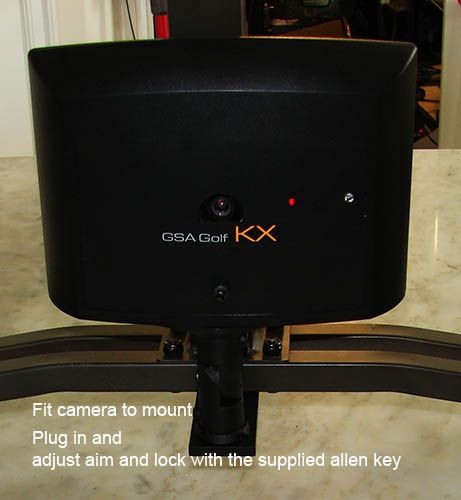
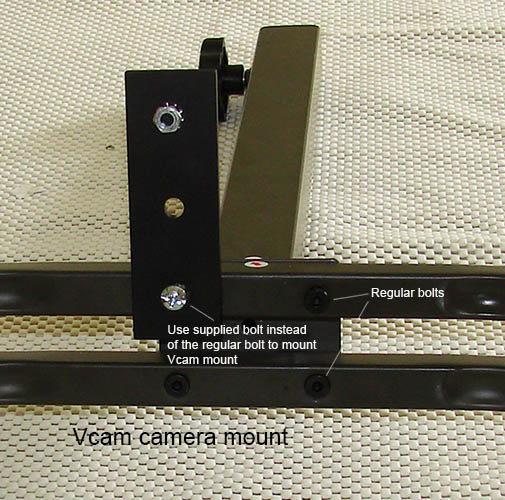
KX LED Lights and camera mountingl
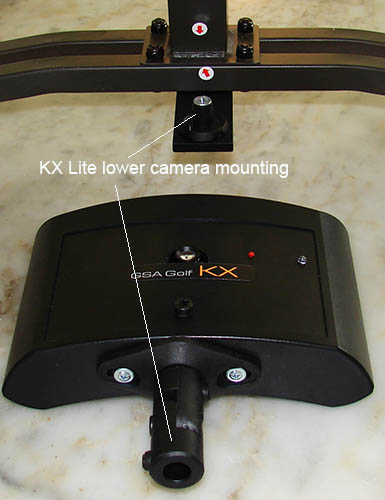
KX 2 Lite lower camera mounting
KX 3 lower camera mounting
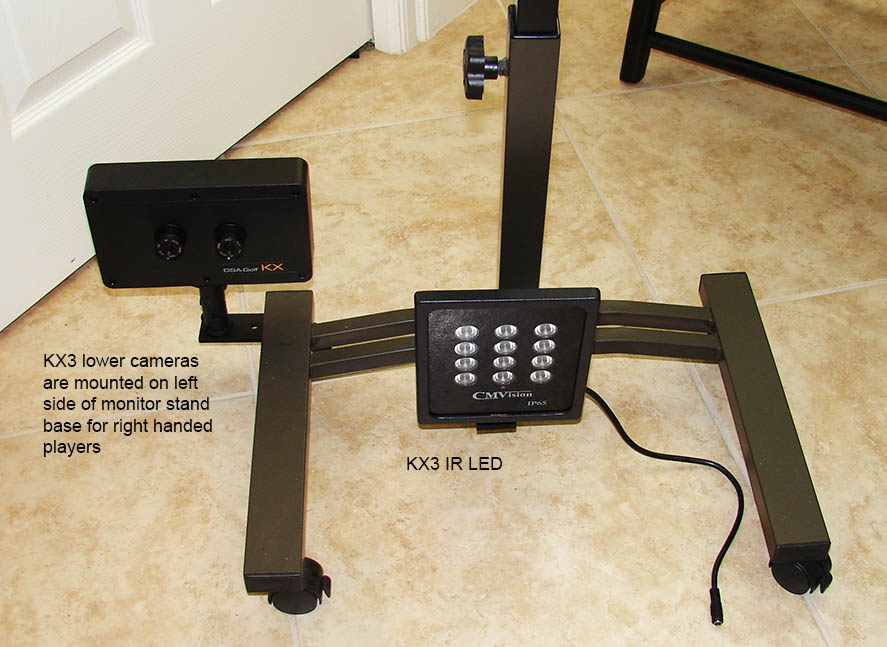
The KX3 lower cameras are mounted on a separate bracket that is attached to the side of the monitor stand.

The KX3 lower IR LED light is mounted on a bracket that is attached to the monitor stand post bolt
![]()
Ball spin and vertical launch cameras - add-on to KX1 or VisTrak Eagle
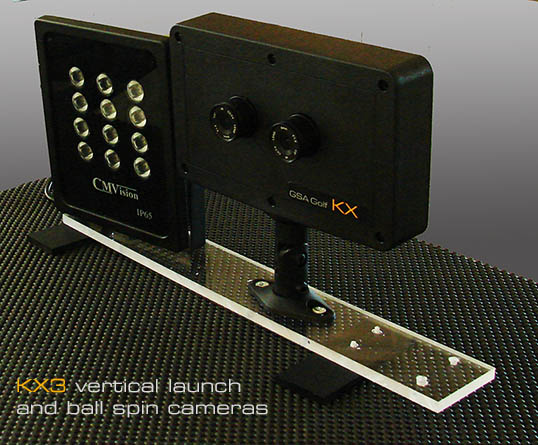
Base mount version
$ 1,699

![]()
GSA Golf system minimum PC requirements

Intel i5 or above Processor
8GB RAM Nvidia 1070 Graphics Card or equivalent
(Dedicated GPU with DirectX 11 Support)
25GB of Hard Drive Space
Windows 10 (Required)
Internet Connection (Required)
When using VisTrak systems - Native USB3 ports (Required)
( i.e. no add-on PCie USB3 adapters for PCs that don't come with USB 3 ports as standard )
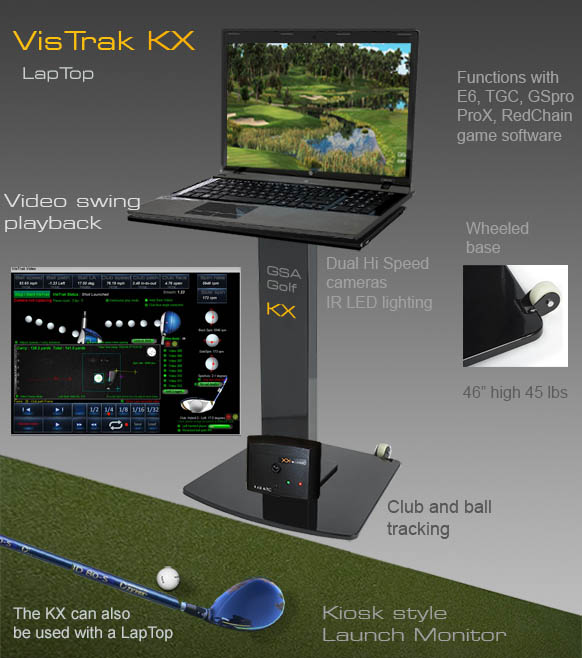
KX Laptop
![]()
KX Software Installation
The KX2 consists of 2 cameras
1. VisTrak high speed camera (that is mounted under the table top)
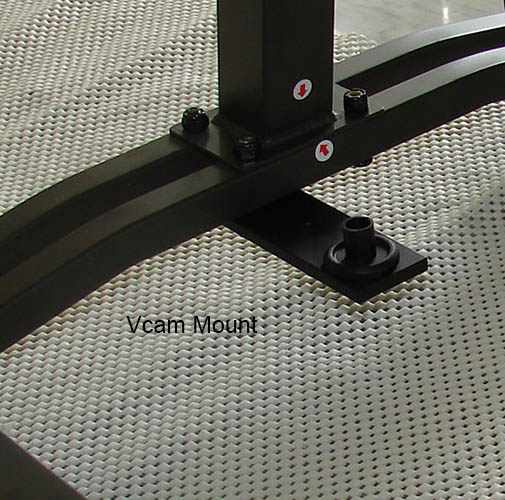
2. Vcam vertical launch camera (this mounted at the base of the unit)
The KX1 has just the VisTrak camera
![]()
The KX uses the same camera as the VisTrak Eagle
so please install all the Control Panel and camera drivers shown on the VisTrak Eagle installation page
First read the above VisTrak Eagle insallation page
Also, as the KX setup is essentially the same as the VisTrak Eagle,
check out the above VisTrak system check list and Real Customer issues pages.
![]()
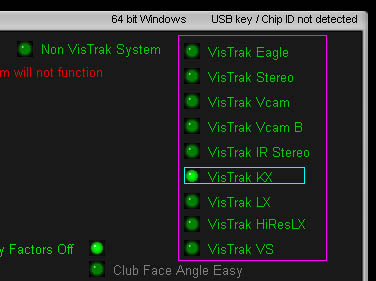
Select VisTrak KX1 in the Setup window
In the camera panel of the CP , ensure that camera 1 is the Vcam camera
( the lower level camera on the unit)
and that camera 2 (the VisTrak camera is under the table top) is the VisTrak camera.
With the KX2 system camera 1 is the Vcam camera ( the lower level camera on the unit)
and camera 2 is the VisTrak camera (the VisTrak camera is under the keyboard shelf)
![]()
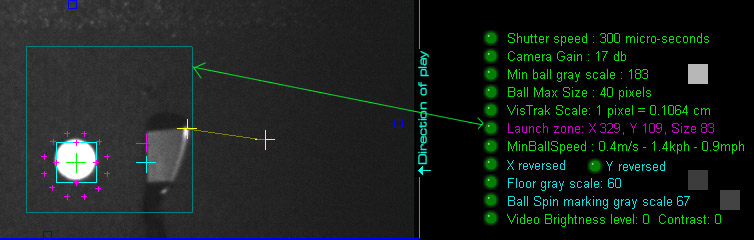
New KX default settings for the KX Vcam and the KX VisTrak camera
Most of these settings are set for you when right clicking on the "defaults" button in both camera windows.
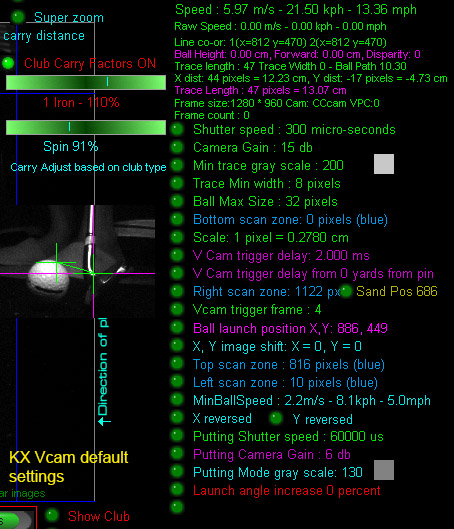
The camera settings for the Vcam window are as above.
Select camera 1 to see these settings in the CP's camera panel
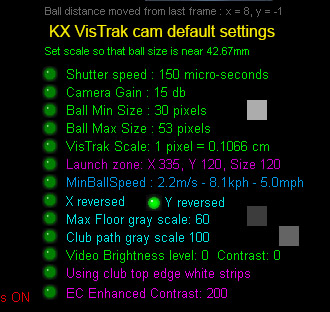
The camera settings for the VisTrak cam window are as above.
Select camera 2 to see these settings in the CP's camera panel
Note: This feature is only available on CP versions 9.6.4.4 and higher
![]()
Important !
Please note:: KX minimum max ball size is now 70 pixels.
This is required as ball images can increase greatly with launch angle
due to the camera being so much nearer the ball than when the camera is ceiling mounted.
This feature is now standard on CP versions V 9.6.4.7 Alpha2 and higher
![]()
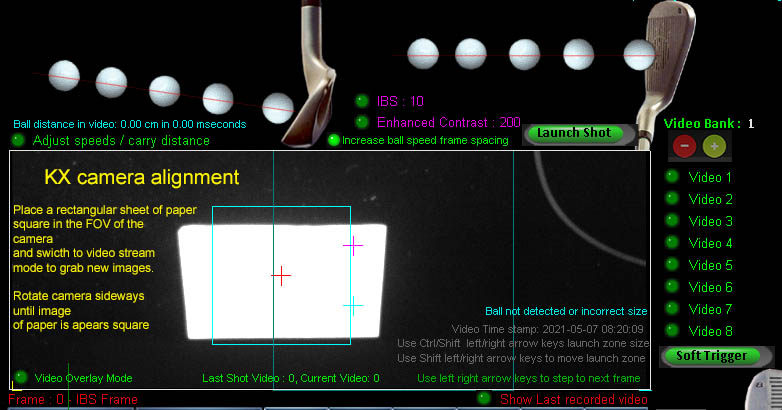
Checking the launch zone area
Place a golf ball on the usual hitting position.
Run the camera in Video Stream mode to properly focus and aim the cameras at the ball
so that the ball appears in the center of the screen.
![]()
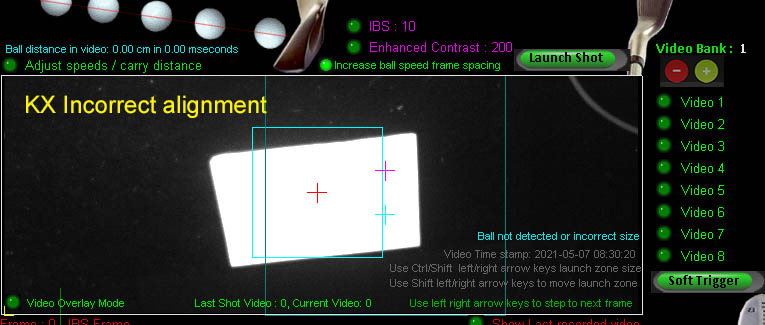
KX camera allignment
KX ball path adjustment
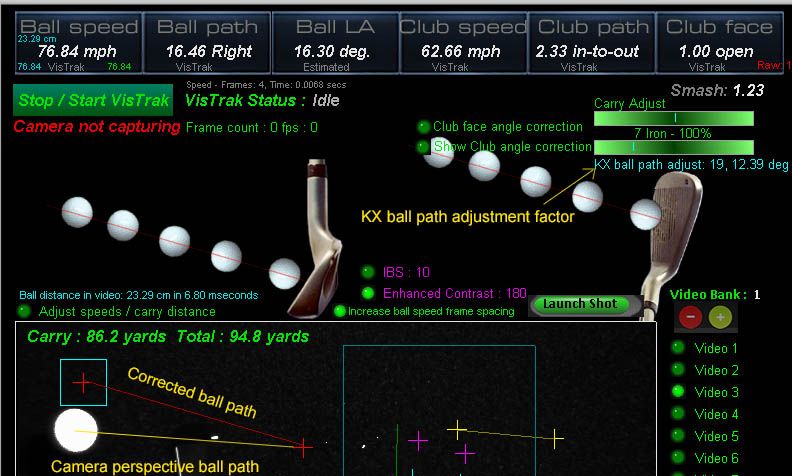
VisTrak KX perspective correction
For those that will not be using the top camera arm extension.
Depending on the launch angle of the ball, the ball path will appear in the camera to go further to the left although the path was actually dead straight.
This is because the camera is viewing the ball from an angle.
The KX Ball path correction factor fixes this issue.
The factor is based on the launch angle of the ball and only has to be set once for all shots as the correction is dynamic.
Putts and very low shots require little or no correction, whereas high shots will require far more.
The precise factor will depend on how the camera is mounted under the monitor stand and at what angle it is viewing the ball.
To set the ball path correction factor,
strike a straight shot with a high lofted club and adjust the factor slide bar until the ball path is zero.
Default adjustment factor is 16
Note: This feature is only available on CP versions 9.6.3.8 and higher
![]()
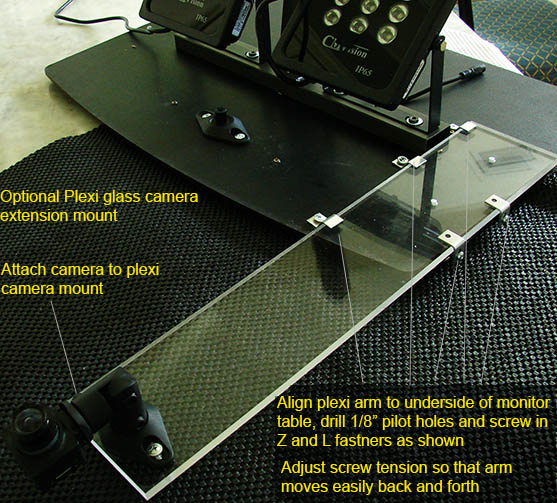
KX top camera extension
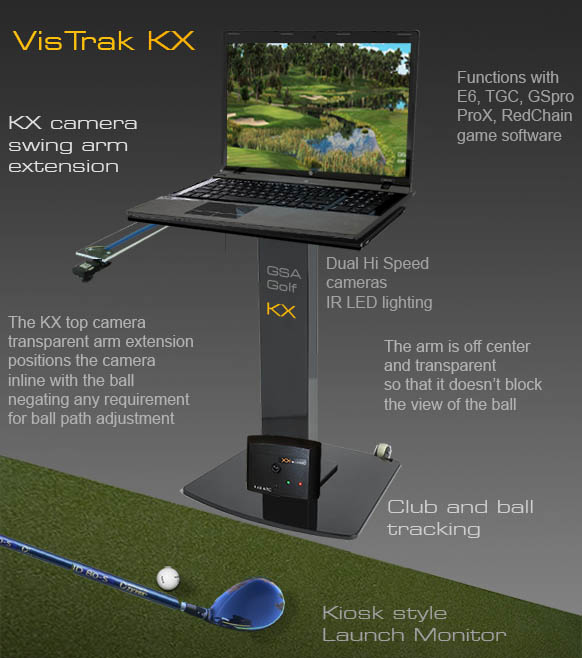
In order that the KX top camera views the ball directly in-line and down on the ball instead of at an angle,
KX users can add this free camera swing arm extension.
The advantage is that there's no ball path correction required and ball path in the video playback is shown exactly as played.
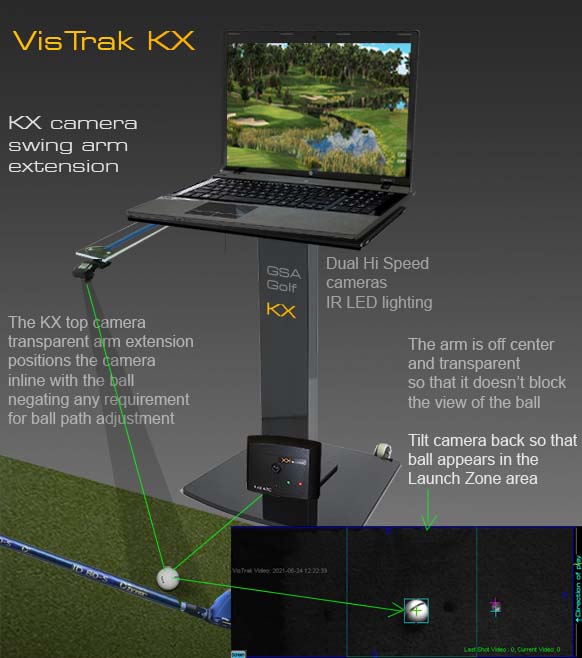
When using the swing arm camera extension, the camera should be tilted back and not be aimed straight down,
so that - when the ball is placed centered under the monitor tray - it appears in the center of the launch zone area.
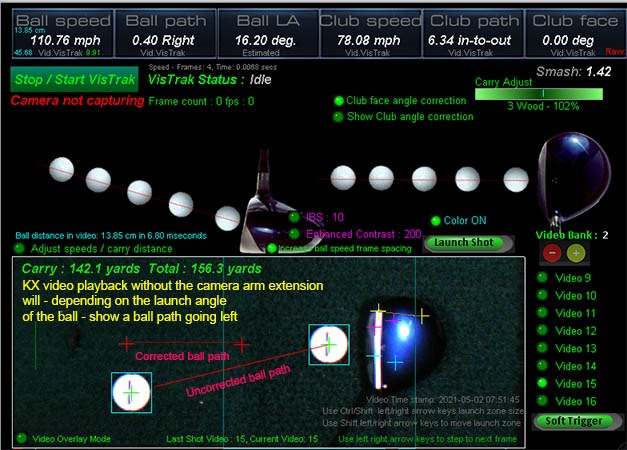
Image of a straight shot without the KX extension arm
Depending on the launch angle of the ball and due to camera perspective of the camera viewing
the ball at an angle from under the monitor table (i.e. when not using the extension arm)
the KX shot video playback would show a ball path going further left than it actually was.
While path correction is performed to fix this problem, viewing the video playback may seem confusing.

Same straight shot but with the KX extension arm
In contrast, when using the KX camera extension arm, no ball path correction is required
and the video playback shows the ball path exactly as played.
Note: the above two images are from the new KX Color version which is an optional extra.
Standard KX video images are with IR light and thus mono (i.e. non color) images
![]()
The KX Vcam
VisTrak KX2 - Vcam LA detection methods
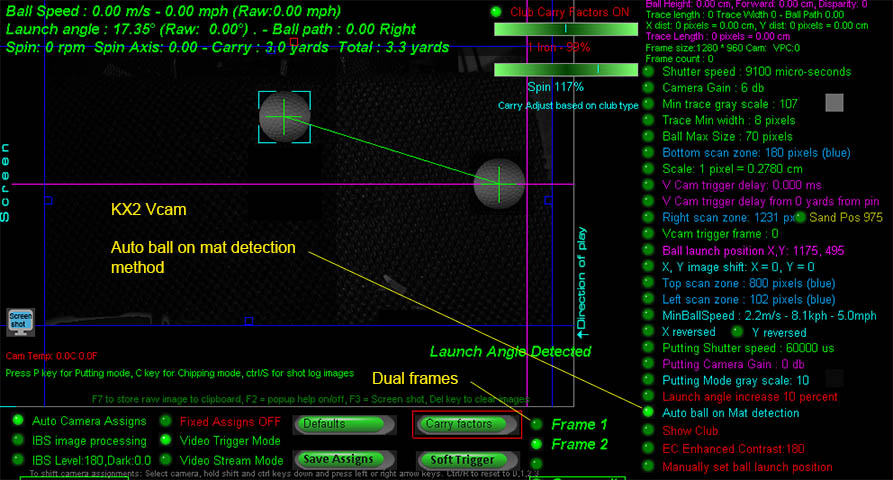
The new Auto ball on Mat detection method for the KX2 Vcam will automatically detect the ball's position and height
(i.e. on a Tee) on the mat during the VisTrak's "Looking for ball" mode.
The Vcam now has 2 frames. One of the ball as detected on the mat prior to ball strike and the other of the ball in flight after ball strike.
Knowing the position of the 2 ball images in the frames allows accurate ball launch angle to be calculated no matter where the ball was placed on the mat
and no matter how high any tee is.
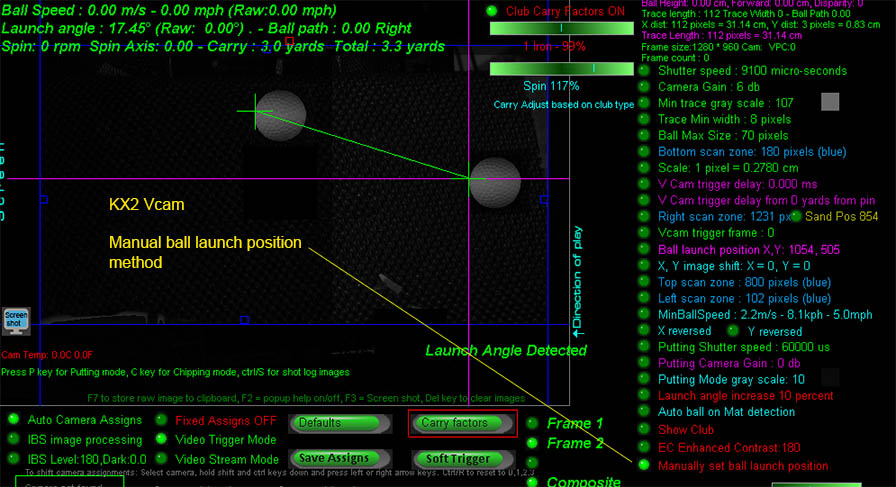
The previous manual method that requires the user to set a fixed ball launch position is still available for those that may prefer it.
When using this method, only the front of the ball image is detected.
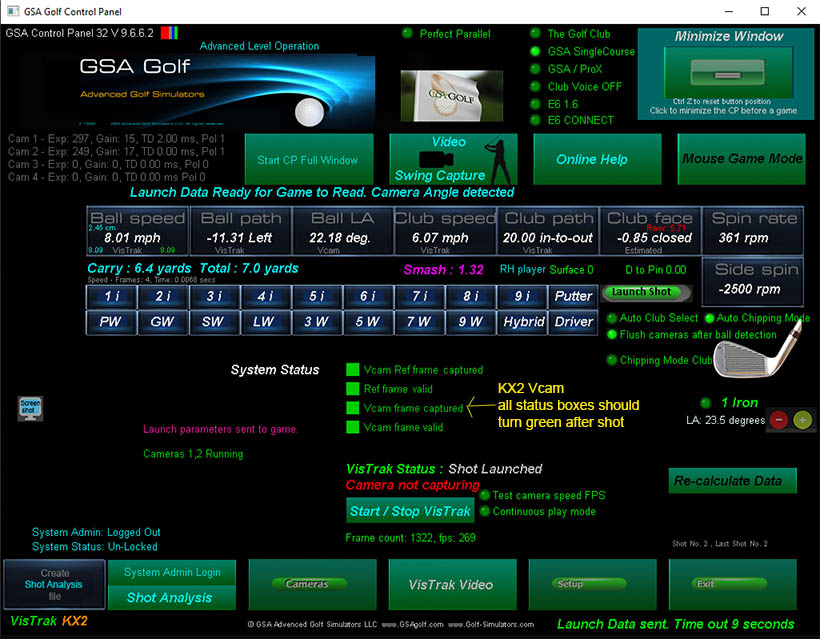
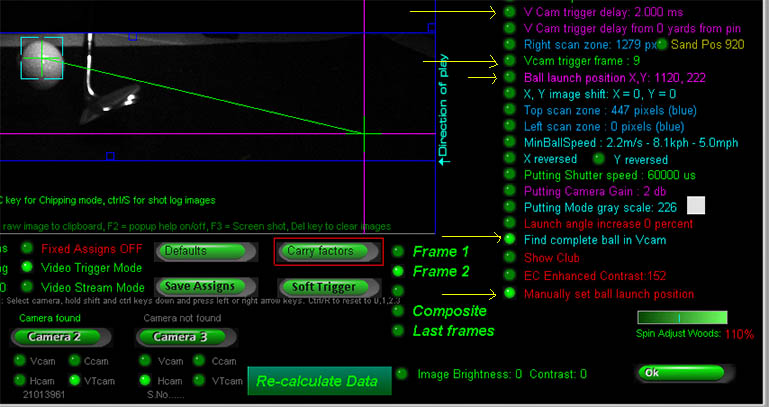
When viewing just the control panel, you should see that all system status boxes turn green after a shot
The "Vcam Ref frame" or "Frame 1" is the frame of the ball on the mat before ball strike.
The "Vcam Frame" or "Frame 2" is the frame of the ball in flight.
Ensure that the ball on the mat is in the FOV of the Vcam when placed on the mat or Tee. Rotate camera if not.
Select camera 1 in the Control Panel to view the Vcam images.
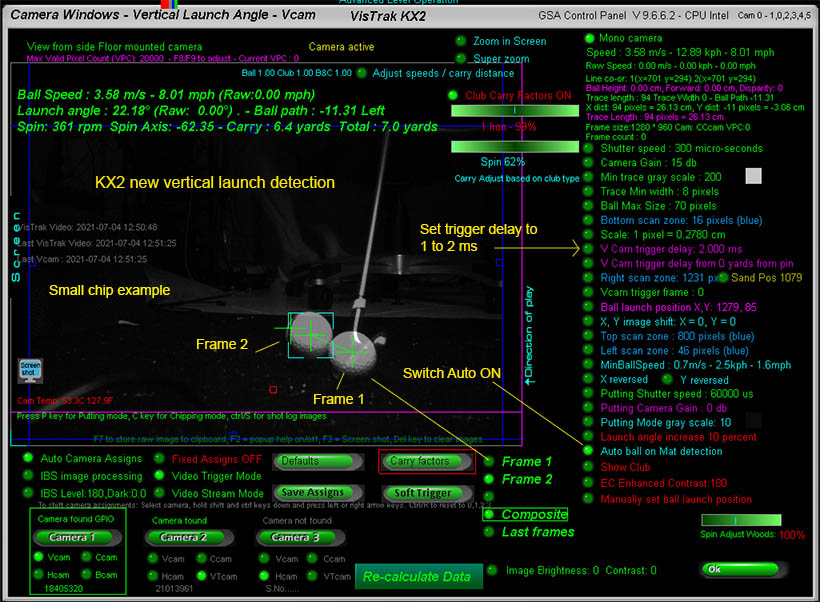
KX2 Vertical angle launch detection
As of CP version 8.6.8.9
The new KX2 vertical detection options are:
1: Find complete ball in Vcam
If ON, the complete ball will detected.
If OFF, only the front top edge of the ball will be detected
2: Manually set ball launch position
If ON, the ball LA will be measured from whatever the manual ball launch position is set to.
This is useful when the ball on the mat is not in the FOV of the camera before ball strike.
If OFF, then the ball on the mat before ball strike has to be in the FOV of the camera.
LA is then measured from this position to the position of the ball after ball strike
3: Vcam trigger delay
The number of milli-seconds the Vcam camera waits after the trigger signal so that the ball has time in flight to gain height off the ground
4. Vcam trigger frame
The number of frames to wait after the ball strike frame in the VisTrak Eagle before a Vcam trigger signal is set.
Set from 1 to 5.
![]()
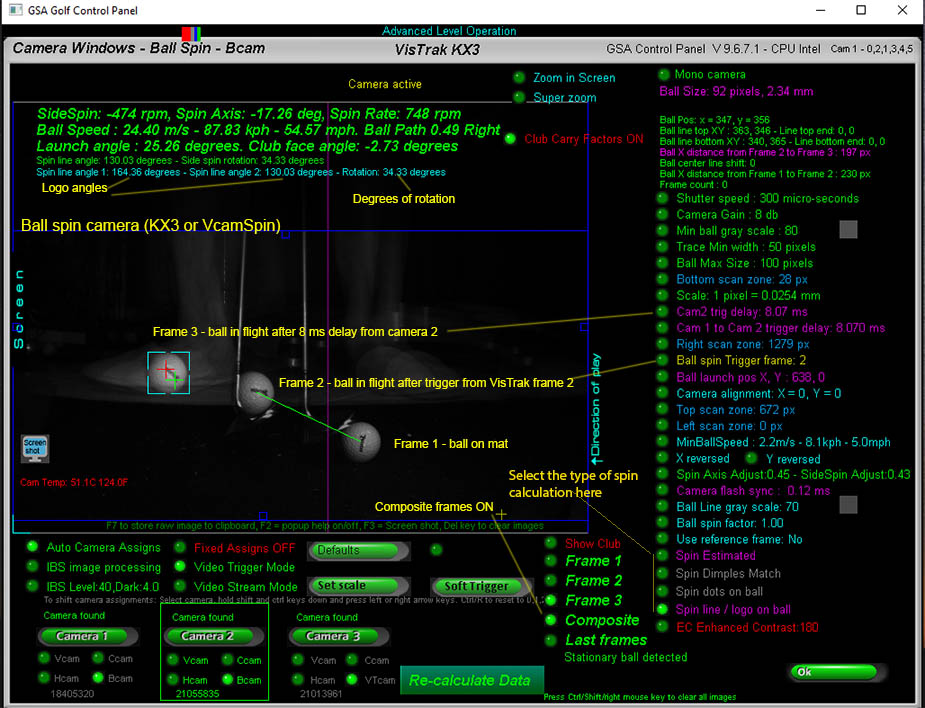
KX3 settings
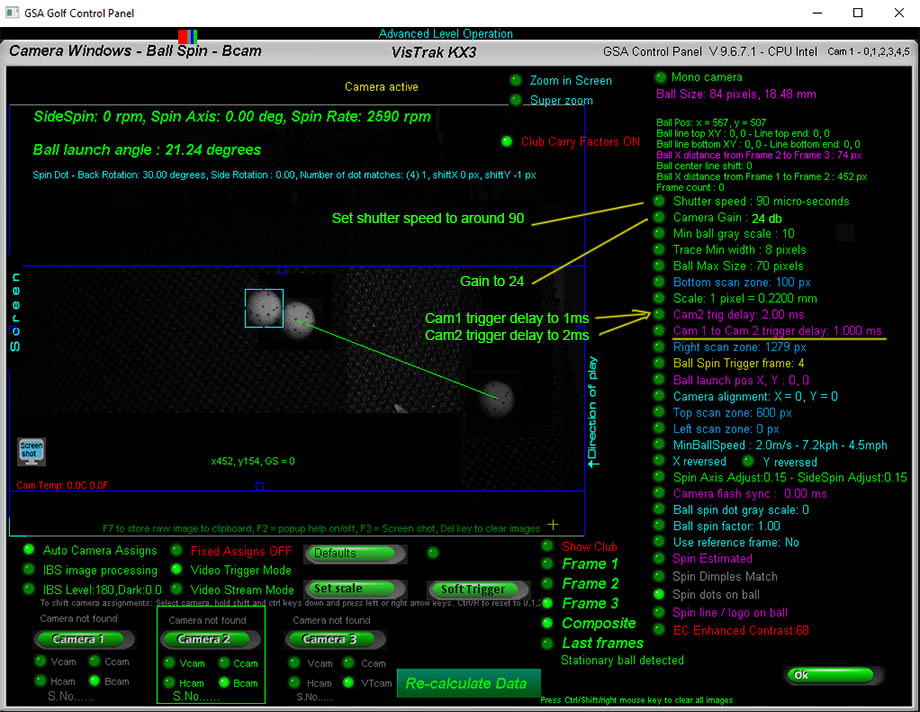
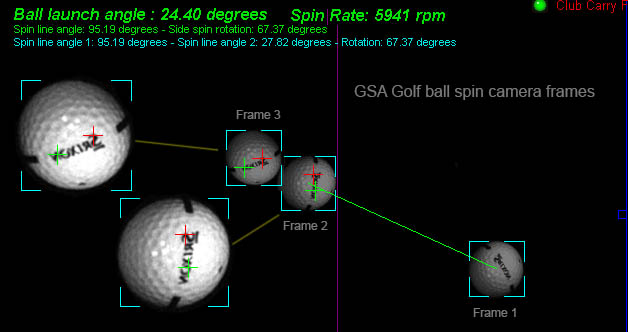
The KX3 can use the ball logo to detect ball spin as well as spin dot markings.
![]()
Technical Support


Email and remote access support is available for all original purchasers of GSA Golf systems.
For all non original purchasers (i.e. purchasers of used GSA Golf systems) remote access support can be purchased separately.
Click above images for more information.
![]()

![]()

![]()
 Home
Home Products
 Cameras
 Software
 Enclosures
 GSA Courses
 E6 Courses
 Business
 Tech News