![]()

Please note:
The VisTrak IR VC has been replaced by the VisTrak IR V Stereo


Click above image to read more about the VisTral IR Stereo
![]()
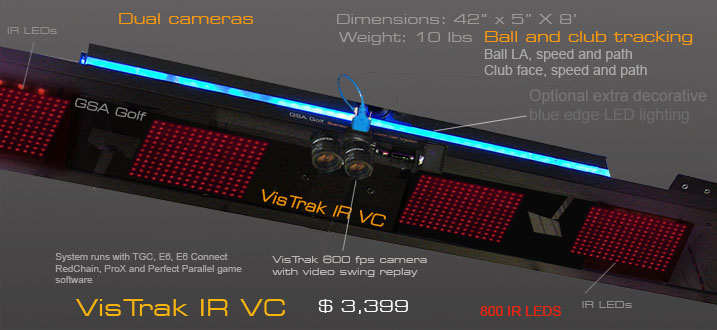
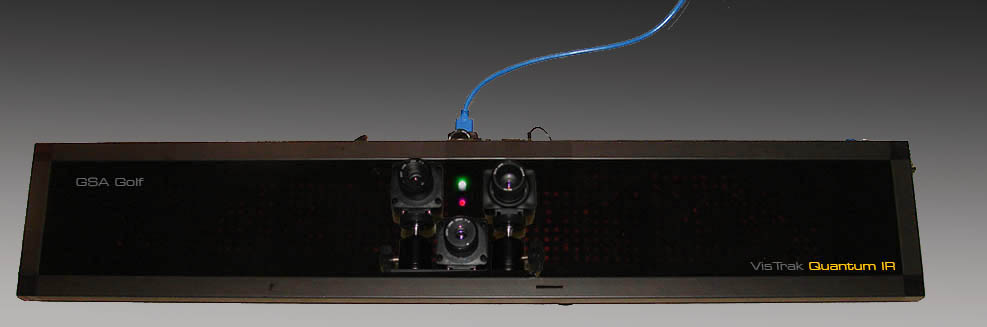
VisTrak IR VC
The new VisTrak IR VC features 4 IR LED boards, cables and power, Laser type LED ready indicator and the VisTrak camera all in one slim line light case.
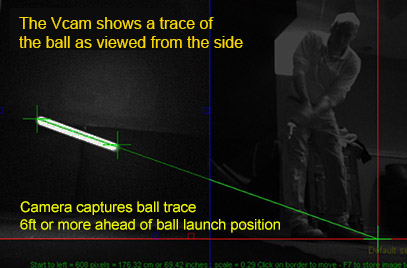
The VisTrak IR VC also includes the Vcam C camera for vertical launch detection

$ 3,399
Contact us to purchase

![]()
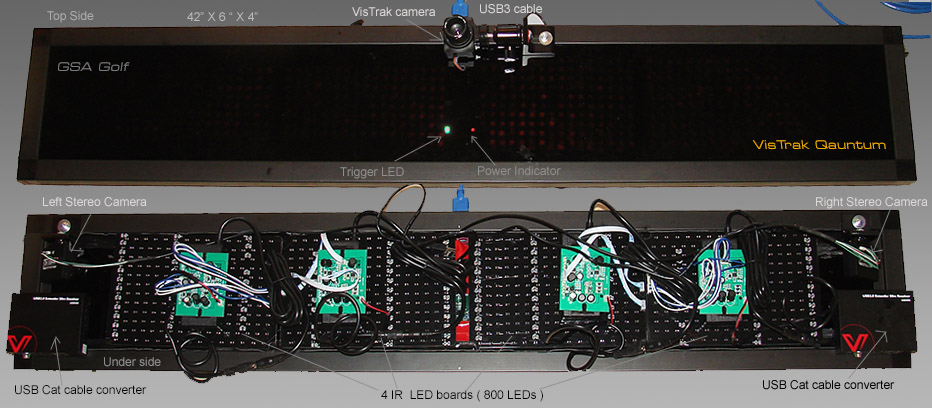
VisTrak IR VC installation
Camera wiring
-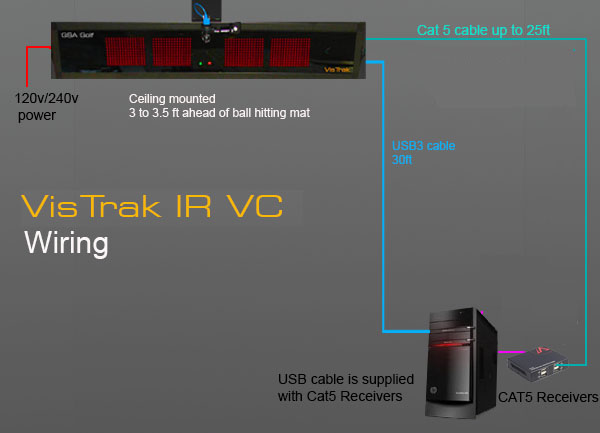
There are 2 cameras in the VisTrak IR VC system.
1. A USB3 VisTrak camera - high speed camera
2. A Vcam C USB2 / Cat5 camera - high resolution camera
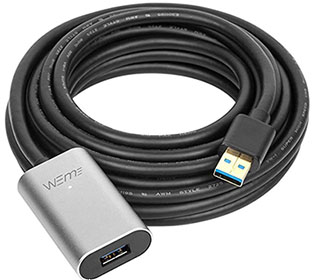
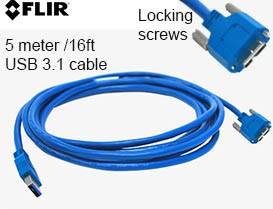
The VisTrak USB3 camera is connected to the the PC via the supplied USB3 cables

The Vcam C USB2 / Cat5 camera is connected to the PC via the supplied Cat 5 cable and the Cat5 transmitter adapter
![]()
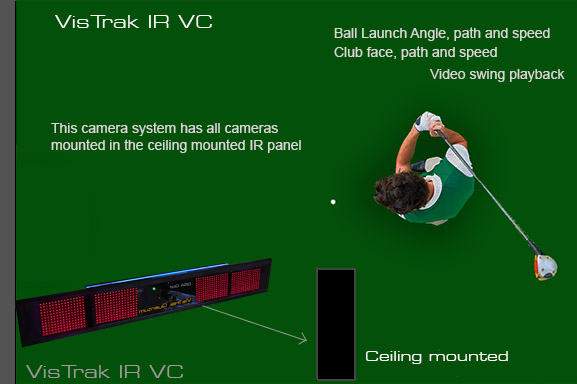
VisTrak IR VC Mounting
Note that he VisTrak IR VC is the same as the VisTrak Quantum but without the 3rd ball spin camera.
-

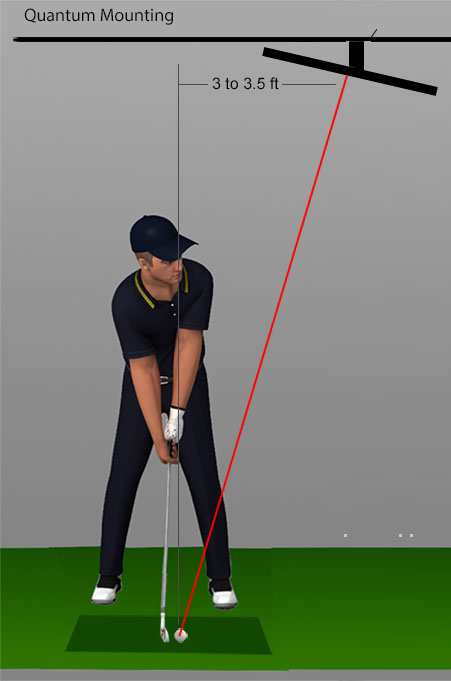
Use the ball swivel joint on the Projector mount to angle the VisTrak IR VC directly
at the place where you will be playing the ball from.
![]()
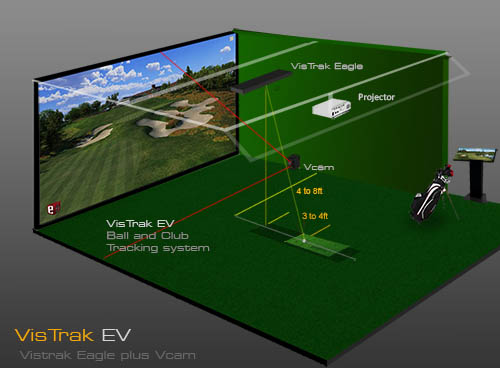
VisTrack IR VC system setup
The VisTrak IR VC consists of 2 cameras: The VisTrak Eagle camera and the Vcam C camera
Click on the below links to see how to setup these 2 cameras.


Please note:
If you are new to GSA Golf systems, it is recommended to first setup your IRV V Stereo system in two stages:
1. Just as a VisTrak Eagle so that basic play is possible
2. after you have the VisTrak Eagle up and running and you are able to play a round or 2 of simulated golf in VisTrak Eagle mode,
then add the stereo cameras to the system
VisTrak Eagle Setup
Click on the above link to see how to setup the VisTrak Eagle camera.
![]()
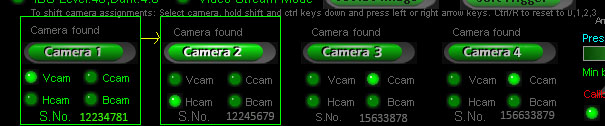
Camera Assignments

If you see the above warning message in the camera windows, then the camera assignments are not correct.
With the VisTrak IRVC, camera 1 is the ball launch angle camera and camera 2 is the VisTrak camera.

It is essential that the correct camera assignments are made.
An error message is displayed if any of the cameras are incorrectly assigned.
Correct camera assignments for the VisTrak Vcam are:
Cam 1 is the Vcam and Cam 2 is the VisTrak camera.
To check for correct camera assignments for the VisTrak Vcam ,
go to the cameras window in the CP and successfully click on the cameras 1 and 2.
If one of the these cameras is incorrectly assigned, a large error message will be shown.
If you find that cameras are not being assigned in the correct order then you can manually re-assign the cameras.
To do this, select the camera in the CP cameras window, hold both the shift and ctrl keys down,
and press the left or right arrow keys to move the camera up or down the sequence.
Auto camera assignments

This new feature eliminates the need to manually assign the cameras
Simply switch on the Auto Camera Assigns option and restart the CP.
How to convert a VisTrak Vcam C
to a VisTrak EV ( Eagle + Vcam).
If you already have a VisTrak VcamC system
and would like to try out your system using a VisTrak Vcam,
then this is quite an easy conversion.
Step 1.
order the Vcam conversion Kit from us - it's free for all VisTrak Stereo and VisTrak VcamC users.
The conversion kit contains a base, camera mount and new 3mm wide FOV lens
Step 2.
Disconnect the cables connected to either one of the stereo cameras (if converting from a stereo system)
or the VcamC camera (if converting from a VisTrak Vcam C system)
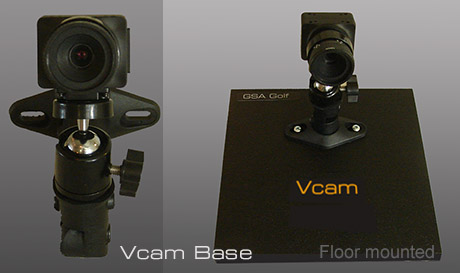
Step 3.
Unscrew the camera and mount it onto the VisTrak Vcam mount on the Vcam base.
Step 4.
Connect a USB 2 cable from the camera to the PC.
Step 5.
Switch to "VisTrak Vcam" mode in the control panel's Setup Window and re-start the CP
Step 6.

Follow the Vcam installation and setup instructions on the above link

![]()

![]()
 Home
Home Sensors
 Cameras
 Software
 Enclosures
 GSA Courses
 E6 Courses
 Business
 Tech News