![]()

VisTrak SCX Installation instructions
Please note: instructions for the new SCXi will be coming later.
These instructions are only for the regular and older SCX system
![]()
Before mounting on the ceiling:
Connect all power plugs to power strip
The large adapters go to the far left and right on the strip.
Other 3 plugs are in between Connect the 2 mini USB2 cables to the left and right cameras.
Connect the blue USB3 cable to the center camera.
Rotate all 3 cameras on their mounts so that that point downwards
Connect the 2 Cat5 cables to the USB-to-cat5 adapters on the unit.
Connect the main power strip cable to a power source and switch power strip ON.
![]()
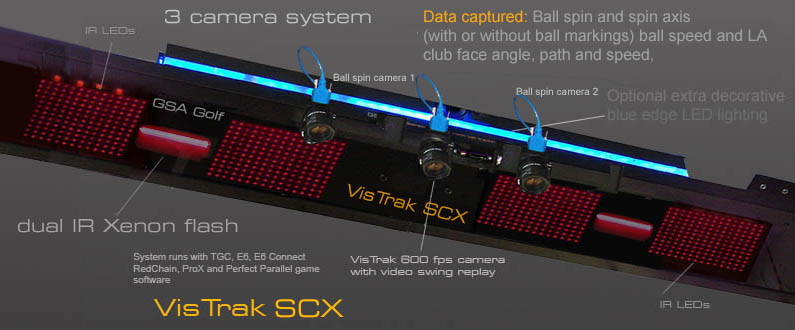
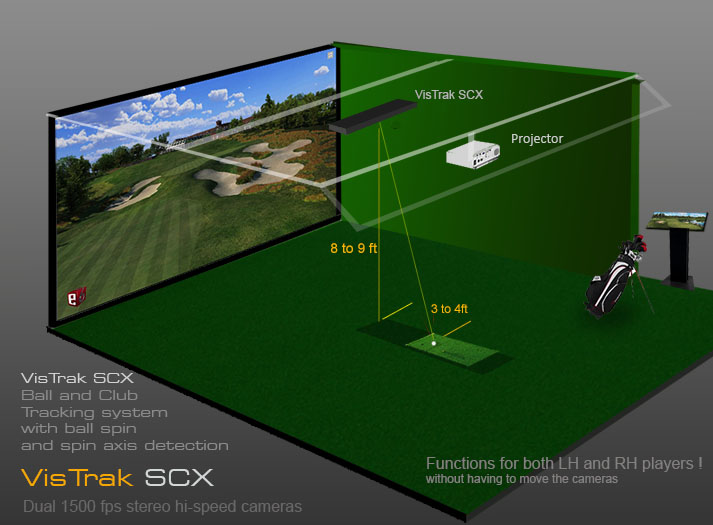
VisTrak SCX
The VisTrak SCX consists of 3 overhead mounted cameras in a IR LED and Xenon flash panel
The center camera is a VisTrak Eagle and the 2 outer cameras are used to measure ball spin and ball vertical Launch Angle
VisTrak Eagle
To get started, first follow all the VisTrak Eagle installation instructions
The VisTrak Eagle is the center camera on the unit

! Please Note !
It is strongly recommended to first get the system to run in VisTrak Eagle mode before attaching the outer cameras.
i.e. you are able to play a complete round just in this mode first.
Click above button to read about the VisTrak Eagle installation
![]()
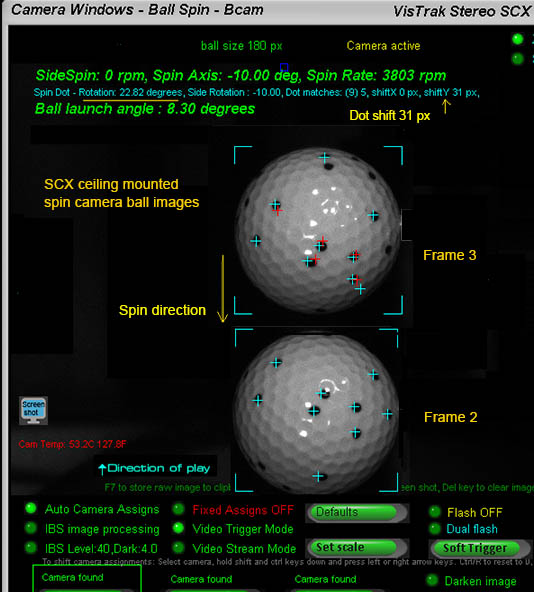
VisTrak SCX spin cameras
The two outer SCX cameras measure ball vertical launch angle and ball spin
All cameras in the SCX are ceiling mounted
![]()
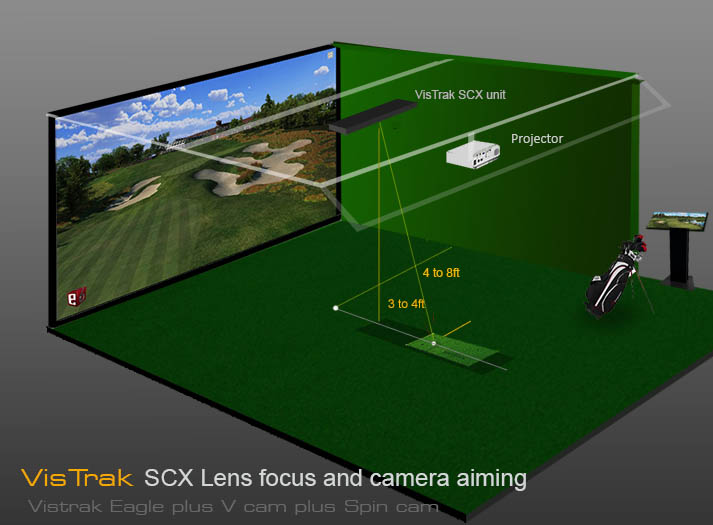
SCX wiring

Run the USB3 and Cat cables as shown in the above diagram
![]()
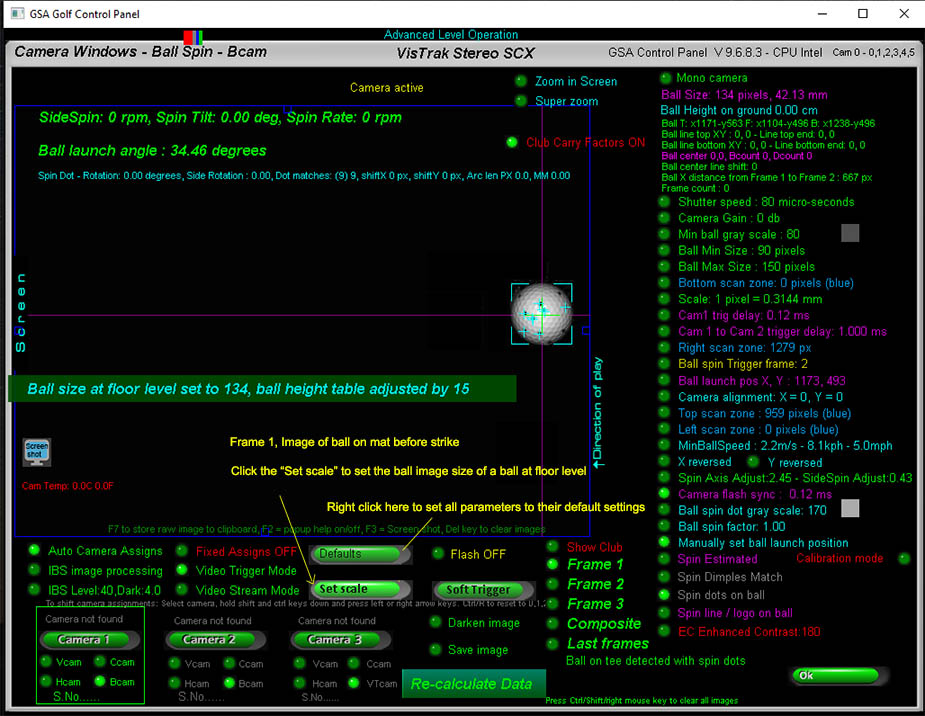
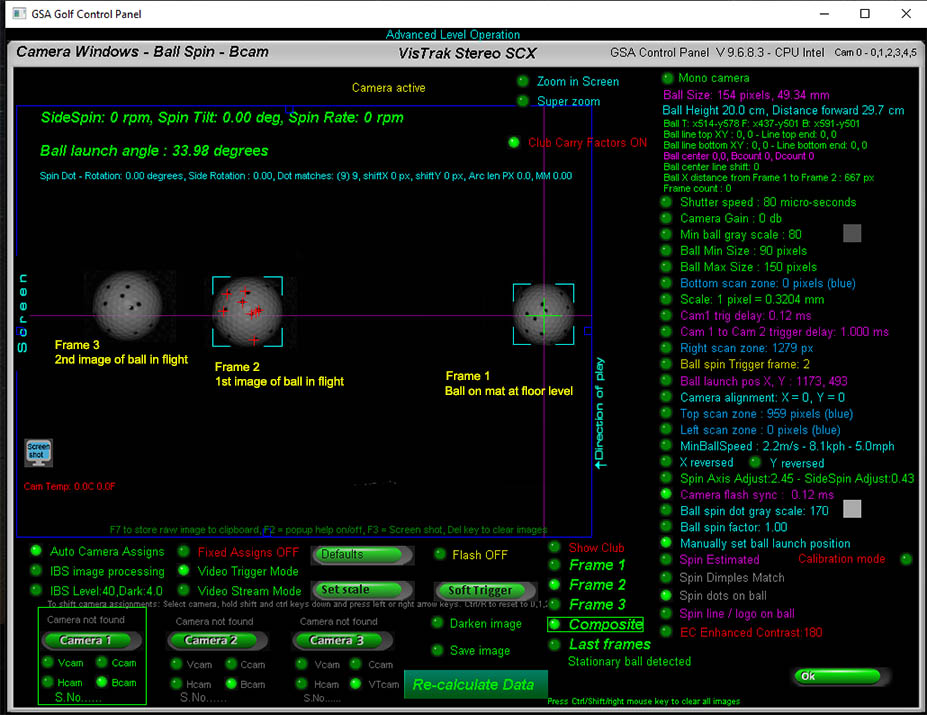
SCX Control Panel settings
Please ensure that you are using the latest Control Panel update
![]()
Click above button to see the latest CP updates
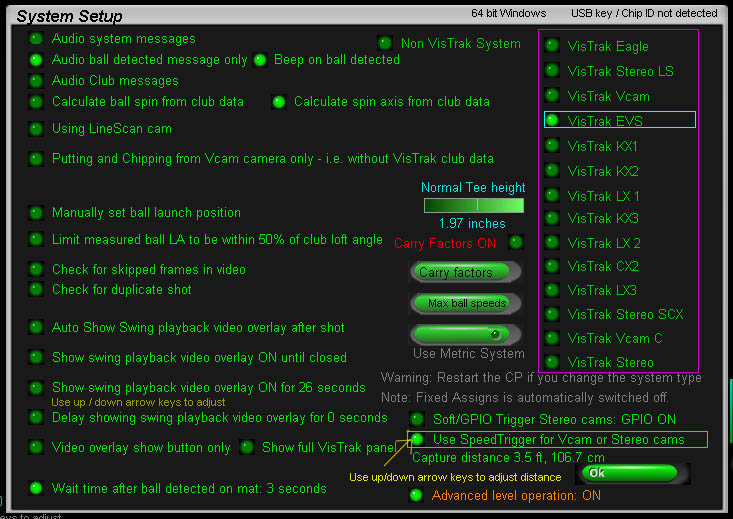
Set the settings as in the above image In the control panel's Setup window
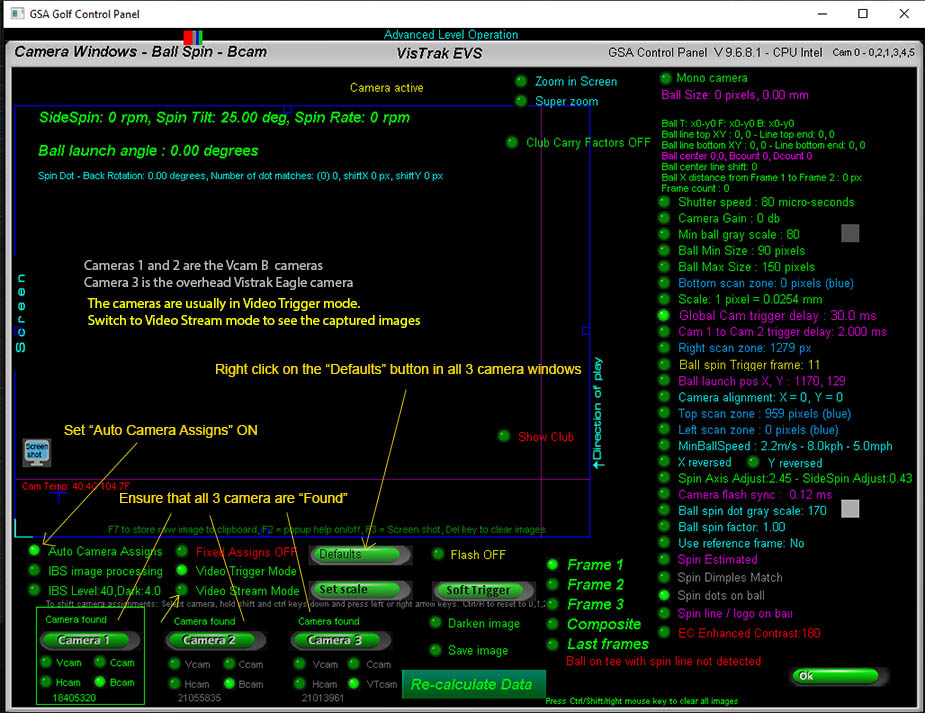
Right click on the "Defaults" button in all 3 camera windows.
Ensure "Auto Camera Assigns" is ON and restart the Control Panel.
![]()
Lens focusing and aiming
It's important that the camera lenses are in focus.
To focus, place a ball on the center line of the enclosure mounted on a box (r any othe object) and point the camera at the ball.
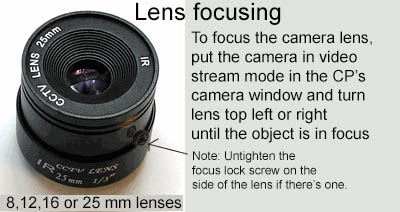
Switch to "Video Steam Mode" in the CP's camera window so that you see the captured images.
Rotate the outer dial on the lens in or out until you see that the ball is in focus.
![]()
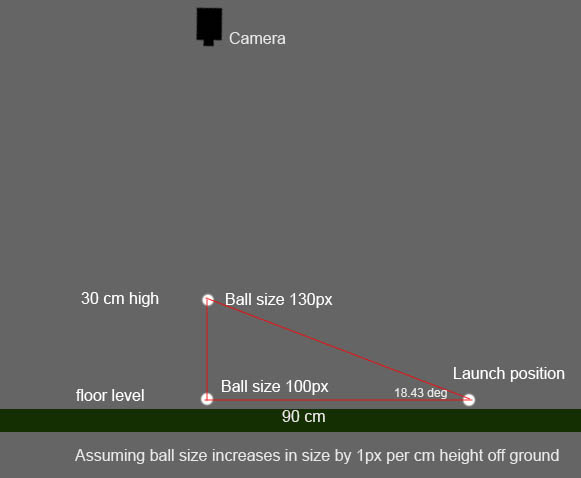
SCX Vertical Launch Angle Detection
The SCX measures ball vertical launch angle by comparing the ball image size of the ball in flight
with the ball image size of the ball at floor level.
![]()
Ball Markings
In order to measure ball spin, the SCX system requires that the balls have markings on them.
10 marked spin dot and marked balls are supplied with every unit.
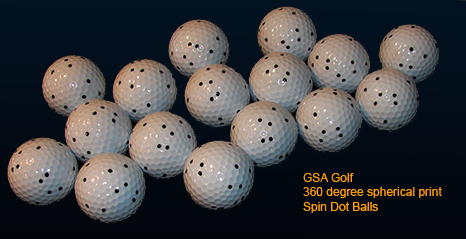
You can use either the supplied spin dot balls or use your own balls that feature a manufacturers logo.
The advantage of using marked spin dot balls

The main advantage of using spin dot balls is that you don't have to bend down and adjust the ball
so that the ball logo or the applied metallic dot is facing in a certain direction.
BTW from what I gather, Trackman and Mevo systems do require you bend down and adjust the ball so that their metal dot
- that you are required to apply to the ball - is facing upwards or in the direction of play.
Another advantage is that you can visible see and thus verify the rate of rotation during the video swing playback with visible ball markings.
In contrast, you won't see this if the ball has no markings so you'd have to just believe that the measured ball spin rate is correct.
![]()

Click above to read more about the Vcam B spin camera setup and theory

Technical Support


Email and remote access support is available for all original purchasers of GSA Golf systems.
For all non original purchasers (i.e. purchasers of used GSA Golf systems) remote access support can be purchased separately.
Click above images for more information.
![]()

![]()
 Home
Home Products
 Cameras
 Software
 Enclosures
 GSA Courses
 E6 Courses
 Business
 Tech News